Worth taking a trip out for in January…

The middle of winter can seem like the very bleakest of times! Much of the bounty of the autumn months has passed and in early January the weather does much to deter even the most ardent foragers. However, for those who still dare to venture out and seek the sheltered spots a pleasant surprise awaits. The youngest and tenderest of the spring vegetables are already with us, together with a number of tasty and nutritious plants and fungi that can be found by the determined all winter long.

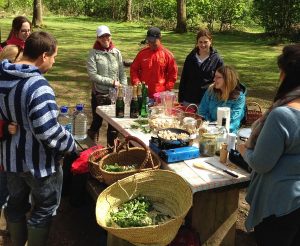
Let’s see if I can tempt you outside to track down and gather some nutritious winter wild food…

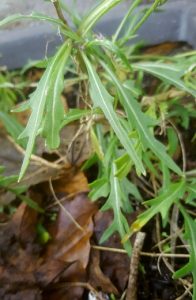
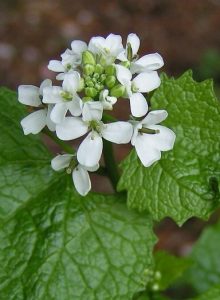
CHICKWEED, Stellaria media, can be found all through the winter and in fact is probably at its level best in winter and early spring. The tender tops of the plant make the best vegetable while the lower portion of the stems can be a bit tough and stringy. I eat the whole upper portion of the plant and the leaves from lower down. Chickweed (see photo) has one very distinct identification feature which will soon turn you into a chickweed expert when it comes to finding this plant. The stems possess a SINGLE row of hairs along one side only. Every time the row of hairs reaches a nodal point (where the leaves and shoots emerge) it moves around the stem by one-quarter turn before continuing on. This subtle feature is actually very easy to see if you hold the plant up so that it is silhouetted by the sky behind.

chickweed

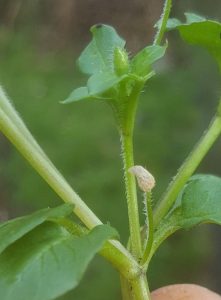
close up showing the distinctive single row of hairs

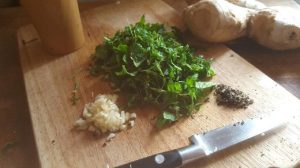
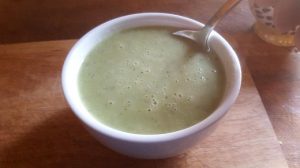
…chickweed is not only one of our commonest wild vegetables, it is also one of the most delicious! It can be enjoyed as a tender and flavoursome salad plant, or made into a somewhat iconic winter soup. I like to add a smaller proportion of another good wild winter vegetable – the red dead-nettle, Lamium purpureum, when I make my chickweed soup.

Here is the recipe.


WINTER CHICKWEED SOUP RECIPE (Serves 2 to 3)

Half a dozen small potatoes – washed but not peeled; chopped into small chunks
3 shallots
2 cloves of garlic
salt and pepper to taste
3 large handfuls of washed chickweed herb
2 large handful of red dead-nettle tops

winter soup ingredients

As soups go this is about as simple and easy as it gets. It is truly delicious though and full of winter vegetable cheer!

Chop the shallots and garlic, and gently saute them in a little extra virgin olive oil until they begin to lightly brown then remove them from the heat.

Add the shallots, garlic and chopped potatoes along with a pinch of salt and a grind of pepper to a small saucepan with just enough water to cover them. Bring them to the boil for a minute or so then and turn down the heat to a low simmer. Add the chickweed herb and red dead-nettle tops and stir frequently. Keep checking to see if the potatoes are cooked. When the potatoes are soft you can either blend in the pan or transfer the whole mixture to a blender. The soup, once blended together, has a wonderful body and is thick and creamy. Season to taste with salt and pepper and serve at once with crusty bread!

chickweed soup

Perennial Wall Rocket

Perennial wall rocket, Diplotaxis tenuifolia


PERENNIAL WALL ROCKET, Diplotaxis tenuifolia,  is another good winter plant to look out for. This plant with small four-petalled yellow flowers survives quite well through the winter though it may not look its level best in the coldest of weather. The leaves look a lot like the kind of rocket that you can buy in salad bags from the supermarket and the flavour is about the same too though a little bit more spicy! This picture was taken in late December… in the middle of winter you will need to pick through the plants a bit to find the best leaves, but they are truly delicious!


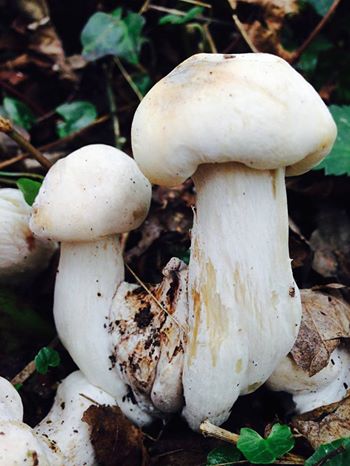
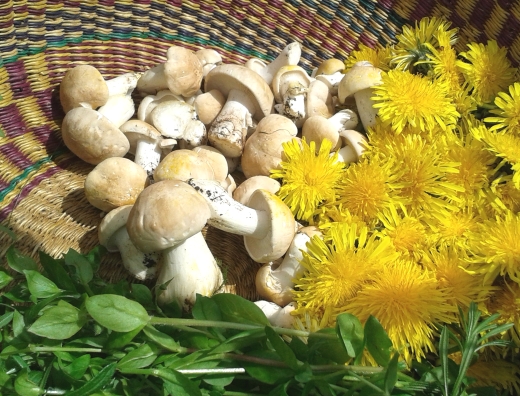
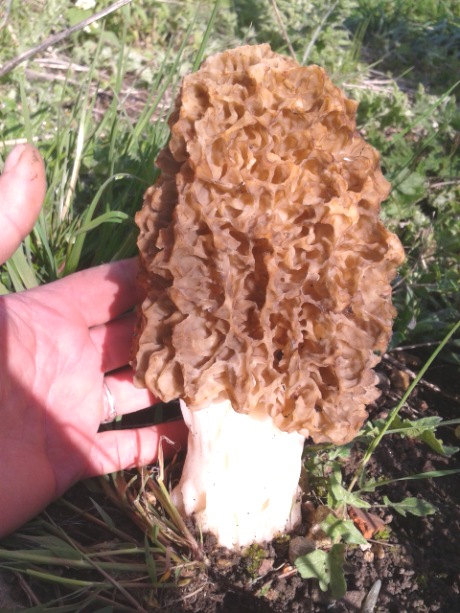
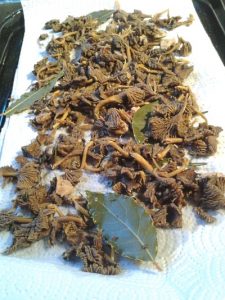
COMMON or GREY OYSTER MUSHROOM, Pleurotus ostreatus, frequently fruits during the middle of winter. The chillier weather of December brings good pickings of one of the tastiest of all mushrooms, the FIELD BLEWIT, Lepista personata, although these are rarely found much after the beginning of January. January however is the peak time for a tasty bright orange-yellow mushroom that grows on dead and decaying trees and stumps…

Velvet shanks

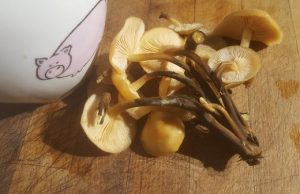
VELVET SHANK, Flammulina velutipes, grows in dense clusters and the stems are covered in a brown velvet down over the lower portion. The gills are pale cream in colour and are not attached to the stem. There is also no evidence of a ring of any kind on the stem. These mushrooms are widely cultivated throughout Asia and you may have even come across them for sale in supermarkets in the UK under the name of ‘enoki’ or ‘enokitake’. The cultivated enoki has a much smaller cap and is wholly whitish, which means that it does not actually look as if it is the same mushroom as the wild one, but it is!

velvet shanks plate of

Velvet shanks are really worth going out to find. Old hedgerows, the edges of ancient trackways and green lanes make the perfect foraging spot for this prize and you may have to poke about in the hedge bottoms a fair bit on order to spot the half-buried orangey clusters of mushroom caps growing from the deadwood at the base of hedging shrubs such as field maple, hawthorn and wych elm. They are not too fussy however and I once even found a cluster growing from the base of a leylandii conifer hedge at the bottom of someone’s garden! Just be sure not to eat any that you find growing from yew as it is possible that they could have taken on some of the toxicity found in that majestic tree. They are probably fine but just to be on the safe side…

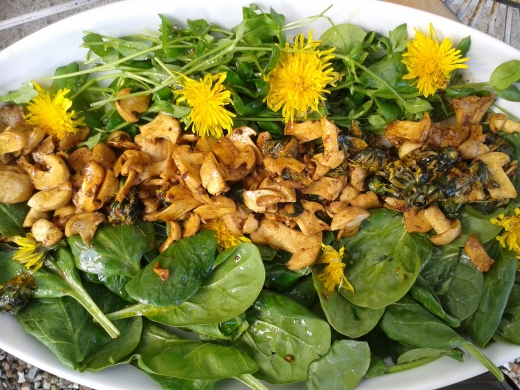
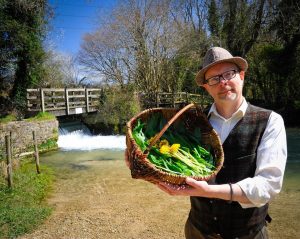
A walk around the field margins and woodland edges at the moment will turn up quite a number of food plants to experiment with. The youngest of CLEAVERS are up and if they grow in your area then young ALEXANDERS are available too. Both are delicious steamed and served with a knob of butter however It is best not to attempt to eat cleavers raw as the tiny hooked hairs that cover the plant can be somewhat scratchy to the throat. JACK BY THE HEDGE, also known as GARLIC MUSTARD, has actually been up for some time and its early tender basal leaves tasting of both mustard and garlic are just right for an al-fresco sandwich or to garnish a dish of cooked potatoes.

So… walking boots on, hand baskets at the ready! There really is no need to stop foraging just because it is the middle of winter and it can be very rewarding indeed for those who take the effort to go out and look. I hope you have enjoyed the few pointers that I have given to get you on your way but there is no substitute for direct experience. Have a happy and nutritious winter foraging adventure!

Putting the Spice Back…

Where is the spice? That is a good question, as one could be forgiven for thinking our ancestors in these islands didn’t care much for it before the middle ages. I can’t help thinking that this may be a misconception that has arisen out of the cuisine of the last 100 years though; doubtless somewhere there is a food historian who can put me on the right track?…

Jack by the hedge

Jack-by-the-Hedge: image by Sannse at the English language Wikipedia [GFDL (//www.gnu.org/copyleft/fdl.html)

We DO have wild spices growing here in Britain and Ireland. Much of the knowledge surrounding their use must be lost if it was ever here in the first place, so I am going to do a bit of learning by experimentation instead and from time to time share my experiments here, with you!

Jack by the Hedge / garlic mustard – Alliaria petiolata

I thought I would start with this plant because it is a good contender. Not only is it in the very edible cabbage and mustard family, its leaves are hot and spicy, tasting of mustard as well as garlic – as its other name, ‘garlic mustard’, explains… but what of the seeds I thought? According to Saul et al, in “Phytoliths in Pottery Reveal the Use of Spice in European Prehistoric Cuisine”1, garlic mustard was definitely in use as a spice in the baltic region of Europe over 6000 years ago.

seeds of garlic mustard

Jack by the hedge – garlic mustard in seed

Some time ago I remember sampling some out in the forest as I was walking along a shady wooded ride and being immediately taken aback by their ‘kick’. I revisited this place where garlic mustard grows all around, so as to recreate the sense of connection with this experience and take my spice journey further on to its next stage.

The first obstacle I came up against was that the seed pods appeared to be all ripening at different stages, meaning that some seed fell to the ground as soon as I touched the plant, but much of it was practically inseparable from the stringy seed cases surrounding it.

I soon resolved to harvest all of the seed pods regardless of maturity and attempt to ripen them in the sun when I got home. I found that I could save a lot of time by holding a large bag open and stripping the whole seed pods en-mass by sliding my hand down the stems. Here is the result…

garlic mustard seed separated from the pods

garlic mustard seed separated from the pods by sun drying then rubbing between the palms

Once at home, I placed the seed pods in a large glass dish and let the sun do its work. I brought them in each evening and waited until things began to warm again each day before putting them back outside on a table in the sun. After about 3 days more than three quarters of the seed was fairly ripe and I judged that the remainder had probably hardened enough to strip from the pods without much damage.

I found that the best way to remove the seed was by rubbing the pods between my palms, and to twist any that were stubbornly hanging on to their seed between my fingers until they ruptured and twisted undone. The seeds, being small and heavy, all sank to the bottom of the bowl. I then used a colander to separate the seed pods from the seed – putting the whole lot through it 3 times…

garlic mustard seed ready for storage

SPICE SCORE: 8 out of 10

I dried the seed a little further to lower the moisture content prior to storage, simply keeping it out in our warm scullery on a stainless steel tray for a couple of days.

The result is surprisingly good. Though the quantity obtained is small, it is very hot, packing a real punch. It is also pleasant in texture when used as a whole seed. There are definitely overtones of horseradish, garlic and pepper and a little will go a very long way but be warned, the heating effect is cumulative!


1 Saul H, Madella M, Fischer A, Glykou A, Hartz S, Craig OE (2013) Phytoliths in Pottery Reveal the Use of Spice in European Prehistoric Cuisine. PLoS ONE 8(8): e70583. doi:10.1371/journal.pone.0070583

St. George’s Mushroom, Wild Garlic and Elderberry Antipasti

Today I awoke to the sight of a magnificent frost covering the Avebury stone circle and a bluer than blue sky heralding a bright (though as it turned out showery) spring day. Needing to re-shuffle the stores in the pantry I noticed there was still a three-quarter full 2 litre jar of dried St. George’s mushrooms left over from last season, so with the new season definitely underway now I decided to get creative with the flavour of these delightful mushrooms by making an antipasti that combines them with wild garlic ‘capers’ and dried elderberries. You can make this antipasti of mushrooms with either fresh or dried St. George’s and incorporate other foraged ingredients to make a flavour combination that is uniquely your own. Using dried mushrooms has the advantage that it can be made from stores whenever a fresh batch is needed. A lot of other mushrooms will preserve well using this method too, but there is only one way to find out which flavours will work together and that is to experiment. Here is my recipe, enjoy!…

Fresh and picked St George's mushrooms

Forager’s St. George’s Mushroom, Wild Garlic and Elderberry Antipasti

Ingredients:

1.5 litres of dried St. George’s Mushrooms (Calocybe gambosa). You can use fresh St. George’s Mushrooms instead if you like, but you will have to experiment with the volume of brine (vinegar/salt/water) to ensure that there is enough for the quantity that you have. The recipe below should work with approximately 1.5kg of fresh St. George’s too.
A small handful of wild garlic flower buds.
A small handful of dried elderberries (optional).
A thinly sliced knob of root ginger.
2 tbsp of sea salt (I used herb salt in mine).
A generous twist of black pepper.
400ml olive oil.
400ml mustard oil (you could substitute sunflower).
800ml organic cider vinegar.
400ml warm water.
(All quantities are approximate)

Step 1: Marinating

St georges marinading
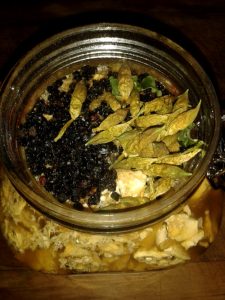
Place the mushrooms, elderberries, ginger, wild garlic buds and black pepper in a large Kilner jar or other similar storage jar. Mix together the warm water, cider vinegar and sea salt until the sea salt is completely dissolved. Pour this liquid brine over the solid ingredients in the storage jar, stir with a wooden spoon and allow the whole to marinade in a warm place for 2 hours.

Step 2: Brining

the brining stage

Strain the liquid from the mushrooms in the jar using a colander or sieve and place it in a saucepan. Bring to the boil over a high heat, stirring occasionally. Do not let the liquid boil over. Once you have the brine on a rolling boil, add all of the mushrooms and other solids back into the liquid and bring the mixture back up to the boil, allowing it to boil for 4 minutes.  Note: Longer boiling times are required for some other edible mushrooms, particularly those in the Russula (brittle cap) and Lactarius (milk cap) groups, as well as honey fungus (Armillaria mellea). If in doubt please consult a reliable source for information about the mushrooms that you intend to pickle. After 4 minutes remove the saucepan from the heat completely. NOTE: After this point all utensils, bowls and jars that come into contact with the mushrooms MUST be sterilised first (using boiling water is fine).

Step 3: Draining

draining the mushrooms

Once again separate the solids from the liquid by straining. You can bottle the brining liquid in a tightly sealed sterilised jar for future use and it ought to be good for at least another couple of brinings. You can always top it up if you start to find you haven’t got enough, so best to keep it for later and avoid wastage.

Spread the solid part, mushrooms, spices and all, onto a clean tea cloth that has been boil washed to remove any traces of taint that may be left behind from washing powder or detergent. Ideally place the dish cloth on an oven tray or similar which will catch any moisture that drips through. Leave the mushrooms to drain for an hour or so, then carefully press out any excess moisture by rolling the solids up in the tea cloth. Do not press too hard or you will ruin their appearance and crush them!

Step 4: Covering in oil

filling the jars

Carefully ladle the dried off mushrooms into the sterilised jars that you have prepared one layer at a time. Cover each layer in your chosen vegetable oil. I have started experimenting with a 60:40 mixture of mustard oil and extra virgin olive oil. So far this seems to be working a treat, imparting a warmness to the pickle as well as improving the colour, without being too thick or having too much flavour. By pouring the oil into the mushrooms in layers and stirring very slowly you will be liberating as many air bubbles as possible from the oil, which will improve the shelf life of your pickle.

Step 5: Labelling

writing the labels
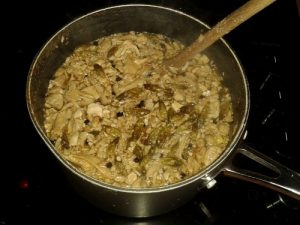
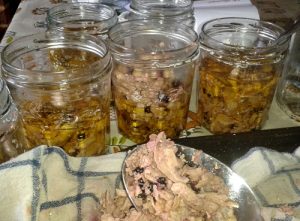
Always remember to label your produce carefully. Everyone must have found an unlabelled jar at the back of the cupboard at some point – with unknown contents that are probably well past their best. Always put the date of manufacture on the label.

Your pickled mushrooms will improve in flavour over a month or more. You should aim to start eating them within 2 months and once you have opened a jar keep it in the fridge and consume within a couple of weeks. For this reason it is better to make lots of small jars rather than one big jar full! Unopened jars kept in a cool place should keep for at least 6 months, probably a good bit longer.

Bon appetite! Enjoy with salad leaves, artichoke hearts or ladled onto doorstops of bread!

If you would like to learn how to identify and find the St. George’s mushroom for yourself, the time is now and the season is short! Why not come and join us at The Wild Side of Life in Wiltshire for a day of St. George’s hunting and dining using wild food ingredients, and enjoy your St. George’s mushrooms over a glass or two of champagne. Bring a friend along to enjoy the fun with you and your second ticket will be half price this year . For more information on this special forage and feast (Saturday 7th of May 2016)

forage day champaigne picnic

The St. George’s Mushroom Champagne Picnic (7th May 2016)

St. George’s Mushrooms and Morels, the Time of the Green Man

This is a blog post about the tradition of St. George and the St. George’s mushroom. For details of the forthcoming St. George’s Mushroom Champagne Picnic please go here. 

St. George’s day approaches (23rd April) and heralds the beginning of spring revelry.  The Catholic St. George was a graft onto older stock and the slayer, or perhaps handler, of dragons is found throughout Europe, the near east and Russia today as a protector and patron saint. In earlier times he took the form of the ‘green man’, representing the rejuvinatory power of spring and the mysterious balance of light and dark, growth, decay, winter and summer that is central to the farmer’s and the forager’s year. In Orthodox Christianity as well as in Russian folk magic and even among the shamen of Siberia, the protector George is often called upon, consulted and prayed to before going ahead with any major work

Green man  - by Grinagog

The Green Man – by Grinagog (grinagog.deviantart.com)

Al Khidr, the Green Saint of Islamic folklore is perhaps another guise assumed by George, or perhaps more accurately another echo that has come down to us via that same ancient river of belief. In the holy-land they are venerated together at one and the same shrines (for example in Bethlehem and Jerusalem) along with Elijah, bringing Jew, Christian and Muslim to enter the same places of worship.  Similarly, in parts of India the cult of Kwaja Khadir is observed by both Muslim and Hindu. In some areas of Eastern Europe the festivities of Green George (Gergiovden) are marked by decking a young man in foliage resembling very much the more modern Hastings Jack in the Green and often he is paraded through the streets prior to being given a good ducking in the village pond or local river.  This festival is very popular in many regions, particularly among the Romani, taking place over the feast of St. George as rendered before post-mediaeval calendrical changes on the 6th of May.

Very soon too, in English fields and meadows, it will be time to make May garlands and walk among the wildflowers of spring purely for pleasure and contentment. In the folk customs surrounding our old May-day the ‘Green One’ will be readied to marry the May Queen, his bride. In England too we have our own traditions to commemorate his life and his passing, as in the (probably now garbled) Padstow Obby ‘Oss song…

“O’ where is St. George, O’ where us he O’
He’s out in his long boat, all on the salt sea O’.
Up flies the Kite and down tails the lark O’
Aunt Ursula Birdhood, she had an old ewe
and she died in her own Park O'”

In contemplation and in honour of these cycles of time and of the year, take a walk out into the grassy meadows and limestone woods to seek the plump creamy-white fruit bodies of St. George’s mushroom. A sign given forth by the earth herself to warn us that night time frosts are now coming to a close and it is the time to be industrious in the fields.

Calocybe gambosum - St. George's mushroom

Calocybe gambosum – St. George’s mushroom

It smells pleasantly ‘floury’ (as if fresh from the miller’s wheel) and often occurs in large wheels in the turf. St. George himself was said to have been ground into flour or ‘broken on a wheel’ at his execution and spread upon the land by his Roman captors, as commemorated in the lines of the old English mummers play “I’ll grind yer bones to dust and send you to the Devil to make mince pie crust”.

St. George's, chickweed and dandelion blooms

St. George’s, chickweed and dandelion blooms are a good combination!

Be very careful to identify it correctly as there are some other whitish mushrooms that are very poisonous. St. George’s mushroom is very tasty though and highly sought after and prized in Italy and France. In Britain it has undergone something of a revival in recent years and it is to be found on the menu’s of many of the better restaurants and gourmet pubs. It can be sautéd in butter and goes well with shallots, asparagus, bacon, eggs and dandelion blossoms. It can also be pickled. The delicate complex flavour is easily overpowered by bolder ones and this is a mushroom to use as the feature of a dish, not a side portion, so take some care about who or what you partner it with.


A warm tossed St. George's salad

A warm tossed St. George’s salad

Also highly prized at this time of the year are the elusive morels, often appearing in limestone woods and on sandy soils during the spring. The caps of these fungi, (there are several species) have an irregular honeycomb like appearance and the cap and stem are hollow. They are difficult to find but highly regarded as a cooking ingredient.

Morchella esculenta - Edible morel

Morchella esculenta – Edible morel

Morels should be dried for storage and re-hydrated using warm water, herbs and a little salt for half an hour or so before cooking as this improves their flavour considerably. They go well with cream based sauces and add something very special to many dishes. Fresh morels can also be stuffed – one popular recipe uses crab meat, egg, mayonnaise and breadcrumbs – and baked for 15 minutes at 180°C. Be sure of your identification and do not confuse them with the poisonous gyromitra or turban fungus that looks a bit similar. Never eat morels raw as occasionally this has caused poisoning! Once again, if in doubt a visit to an expert is required.

If you’d like to sample the joy of Finding your own St. George’s mushrooms then why not try out our St. George’s Mushroom Champagne Picnic on Saturday 7th May 2016. You can find out about it here.

//www.rogersmushrooms.com/gallery/DisplayBlock~bid~5697.asp
//www.rogersmushrooms.com/gallery/DisplayBlock~bid~6466~source~gallerychooserresult.asp
//en.wikipedia.org/wiki/Khidr
//en.wikipedia.org/wiki/Saint_George#Interfaith_Shrine
//www.saudiaramcoworld.com/issue/197106/st.george.the.ubiquitous.htm


Pickled Chanterelles for the Festive Season

pickle


Pickled oak milk caps – Lactarius quietus

This year I have been putting a lot of thought into Christmas presents for the family and I also have a bit of a glut of delicious wild mushrooms in my stores, so I thought I’d share a pickled mushroom antipasti recipe with you which is delicious as a cold salad and can be made with many types of fresh and dried wild mushrooms.


To prepare the pickle from previously dried mushrooms you must first marinade them correctly for 24 hours to soften them. Ideally, if you can, use mushrooms that you have dried at a low temperature (less than about 45 deg) as when they re-constitute they will be a lot more similar to the fresh mushrooms that you started off with.

Marinade for dried mushrooms

To marinade dried mushrooms for use in pickle or elsewhere this is the procedure that I follow. I put the mushrooms in a pint glass until it is three-quarters full, then add a 50/50 mixture of just boiled water and cold tap water so that the mushrooms are just covered. Next I add:

  • Half a teaspoon of salt
  • Half a teaspoon of dried thyme
  • 2 cloves of beaten/crushed garlic
  • A generous dash of balsamic or elderberry vinegar
  • 2 tablespoons of extra virgin olive oil 
  • A generous grind of black pepper

Stir the mixture thoroughly, cover it with a saucer and leave it to stand for 24 hours for some marinading magic!

Preparing the wild mushroom antipasti

If you are using fresh mushrooms then make sure that you cut away and remove any blemishes or brown areas that might be caused by food spoilage organisms. If you are using dried mushrooms you will of course have done this prior to the drying process.

preparations

The ingredients are assembled. It goes against the grain but the mushrooms must be thoroughly cleaned – meaning washed if necessary!

Equipment

  • Stainless steel or non-reactive saucepan
  • Sterilised jars with lids
  • A sterilised food sieve
  • A sterilised ladle
  • A sterilised tablespoon
  • A boil washed tea-towel or similar that has been through a thorough rinse-cycle to remove any traces of detergent

Ingredients

  • 1.5 litres of chopped fresh mushrooms or marinated dried mushrooms
  • 1 litre of white wine vinegar or apple cider vinegar (a little less refined perhaps but I enjoy its full flavour and bite)
  • 600 ml of water
  • 2 tablespoons of salt
  • 4 bay leaves
  • A sprig of rosemary
  • A tablespoon of thyme
  • 10 cloves
  • 10 peppercorns
  • A generous amount of olive oil (not extra-virgin, and avoid ‘pomace’ oils which are often contaminated with hydrocarbon solvents)

Method

Add all of the ingredients except for the olive oil to the saucepan and bring them to a rolling boil. Add the mushrooms and bring the liquid back to the boil. Allow to boil for 5 minutes for small mushrooms and up to 10 minutes if you are using larger pieces or whole button mushrooms. Note – some mushrooms, for example the more acrid milk caps eaten in eastern Europe and the Baltic countries, require longer boiling times. The method given here is for mushrooms that can normally be safely eaten using typical western European preparation methods such as frying.

pickling

Remove the mixture from the heat, pour it through the sterilised sieve into the sterilised bowl, cover and allow to cool. Boiling the mushrooms in the vinegar-brine mixture has sterilised them so DO NOT handle them from now on with fingers or un-sterilised utensils.

Once cooled transfer the mushrooms onto the clean tea-towel and folding it in use it to carefully press out any excess moisture. Do not attempt to wring the mushrooms as they are supposed to contain a little vinegar brine and their appearance will be spoiled if you squash them.

drying

Bottle the pickling vinegar-brine mixture for later use. You can re-use it a number of times as its low pH (very acidic) means that it will not go off.

You can now transfer the mushrooms to the sterilised jars. The best way is to add a layer at a time followed by a very slowly poured layer of olive oil, stirring gently between layers. This will remove the majority of air bubbles which could lead to storage problems. Once you have filled the jars in this way and the mushrooms are completely covered by a centimetre or more of oil, then fasten the lids tightly. Remember to include some of the spices that you cooked them with!

Keep pickled mushrooms in a cool dark place for at least one month before opening, preferably two. Once opened refrigerate them and use them up within a couple of weeks to avoid the risk of spoilage. Always use a clean spoon to ladle them out.

That’s it, enjoy! I hope you like my pictures of the pickled trumpet chanterelles that I made as Christmas presents for my family yesterday 🙂

At The Wild Side of Life we don’t sell pickled mushrooms, but if you’d like an original present why not purchase one of our courses where the lucky recipient will learn all about how to identify, forage and prepare wild mushrooms correctly such as these? We have a 4 day course and several 1 day courses programmed for Autumn 2016!

Wild Garlic, Stinging Nettle & Cleavers Soup

Wild Garlic, Stinging Nettle & Cleavers Soup (serves 8 to 10)

You will need:

3 big handfuls of fresh wild garlic (Allium ursinum) leaves – be careful that you do not pick any Lords and Ladies (Arum maculatum) or lily of the valley (Convallaria majalis) by mistake. Look for the parallel veins running the whole length of the leaf and the unmissable garlic smell!

1/4 bucket of fresh stinging nettle (Urtica dioica) tops – just pinch the tops out with about 4 to 6 leaves on each. You might want to wear gloves for this although I teach everyone who comes on my courses how to pick them without being stung.

Two large handfuls of young cleavers (Galium aparine) plants – you might know this as ‘sticky weed’, ‘goosegrass’ or ‘sticky willie’ in some parts of the UK… make sure they are still soft and pliable as in a few weeks they will stiffen up and after that you use only the softer tip of the plant.

Add a large knob of butter or 2 to 3 tablespoons of olive to a saucepan, together with a few twists of black pepper and sea salt. Slowly raise the temperature to cook the seasoning a little but do not let the oil bubble ferociously – a sign that it is too hot. After about 1.5 minutes add a good splash of balsamic vinegar and 600ml of hot water straight from the kettle. Add all of the leaves that you have picked (ideally) chopped into little pieces first.

At this point it should look like this…

Put on a lid, watching the temperature carefully and stirring periodically. You don’t want the soup to get so hot that it boils as this will seriously affect the flavour, but you do want it to reach a slow simmer for a short period to assist in extracting the flavour from the leaves (this will also kill off bugs as it will cook above 74 degrees centigrade, but in practice this is not really a problem when freshly picked leaves are used taken from a clean spot).

Keep an eye on the soup, allowing it to simmer gently for 6 to 8 minutes, then remove it from the heat and transfer it to a blender. Give it a good ‘whizz’ until a thick creamy soup consistency is achieved, then transfer it back onto the heat and cook for another 2 to 3 minutes, this time stirring continuously. Some people like to cook a few potatoes, blending them into the soup at this stage as a thickening agent. Whilst I do not think this is necessary it is a matter for personal taste.

That’s it! It is a good idea to keep a little of the garlic back and chop it into shreds to use as a garnish on top of the soup. A little finely grated manchego or parmesan cheese will also work well on top and a couple of tablespoons of live natural yoghurt swirled in to each bowl completes the picture properly… and by the way, every portion combines the effects of these herbs to great effect. 

Serving suggestions…

Wild garlic has a natural antibiotic action and is a circulatory tonic that thins the blood a little and warms up the extremities by opening up capillary circulation.

Lightly cooked nettles provide us with lots of vitamin C and iron, as well as a surprising amount of vegetable protein, not to mention huge amounts of the anti-oxidant chlorophyll.

Cleavers is well known to medical herbalists for supporting and clearing the lymphatic system. In short, this lovely soup is also a good medicine for driving away the last of the winter ailments that we tend to suffer from in our temperate British climate, and giving the whole system a kick-starting detox ready for the year ahead!

CLICK HERE TO SMELL THE SOUP – (ONLY KIDDING!)

You can learn much more about simple wholesome wild food cookery at the Secret Sunday Spring Forager’s Club